Heroku
We will be using Heroku, a cloud application platform to deploy our server online. By taking care of most things related to deployment, Heroku makes it easy to get your server up and running.
Before we get started, you must:
- Create a free Heroku account (sign up).
- Install the Heroku CLI.
Next, you must link your Heroku CLI to your Heroku account. This is done by loggin to your account through the command-line interface. Please follow the instructions here. (Only log in; you don't need to create an app, not yet!)
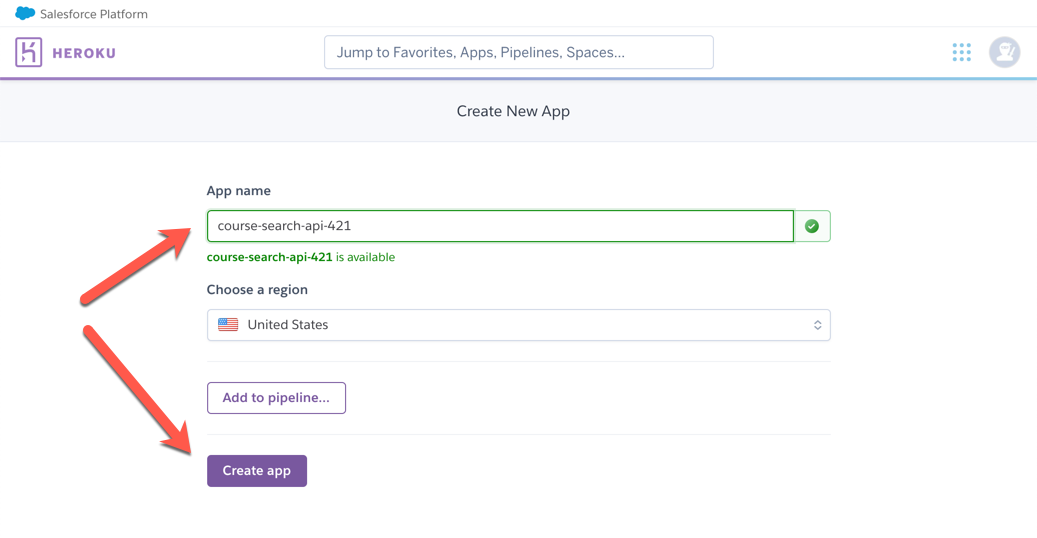
Login to your Heroku account and create a (free) Heroku app.

Give your app a name. You must come up with a unique one.

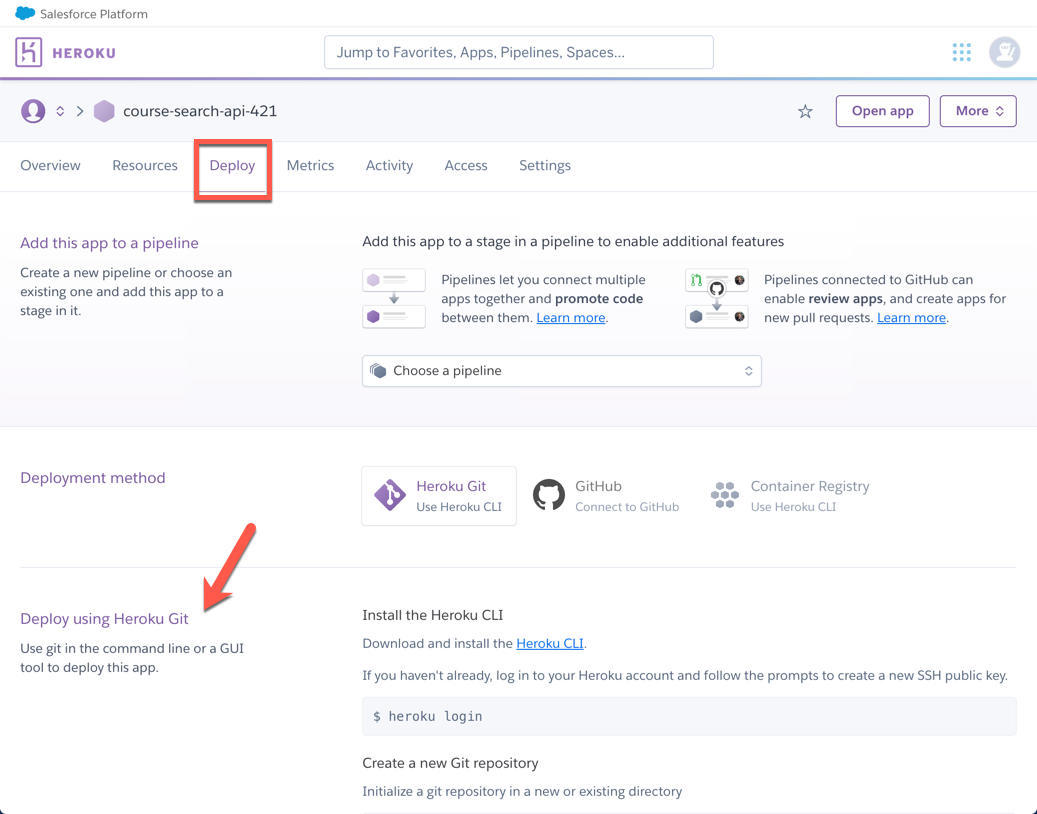
Once the app is created, open the Deploy tab. We will be following the "Deploy using Heroku Git" instructions.

Heroku is deeply integrated with the Git workflow. Since we already have a Git repository (and assuming you have already linked your Heroku CLI to your Heroku account) linking your local app to the Heroku app is simple.
Open the terminal in IntelliJ and enter the following command:
heroku git:remote -a your-heroku-app-name-goes-here