Deploy to Heroku
It's time to deploy our app. We've done this before and you know the drill!
Add the following function to WebServer.java to dynamically detect the port on Heroku:
private static int getHerokuAssignedPort() {
  // Heroku stores port number as an environment variable
  String herokuPort = System.getenv("PORT");
  if (herokuPort != null) {
    return Integer.parseInt(herokuPort);
  }
  //return default port if heroku-port isn't set (i.e. on localhost)
  return 4567;
}
Update the main method in WebServer class:
public class WebServer {
  public static void main(String[] args) {
    final String KEY = System.getenv("SIS_API_KEY");
    Unirest.config().defaultBaseUrl("https://sis.jhu.edu/api");

+   port(getHerokuAssignedPort());
    staticFiles.location("/public");

    // the rest has not changed
Update build.gradle so we can package our web application as a single executable file that can be run on Heroku.
jar {
    manifest {
        attributes 'Main-Class' : 'WebServer'
    }
    from {
        configurations.compileClasspath.collect { it.isDirectory() ? it : zipTree(it) }
    }
}
Moreover, add heroku-gradle plugin to build.gradle:
plugins {
  id 'java'
+ id "com.heroku.sdk.heroku-gradle" version "2.0.0"
}
We also need to add a configuration for the heroku-gradle plugin; add the following to your build.gradle:
heroku {
  jdkVersion = 11
  processTypes(web: "java -jar build/libs/course-search-ui-0.0.1.jar")
}
Make sure to refresh the Gradle project from Gradle tool window.
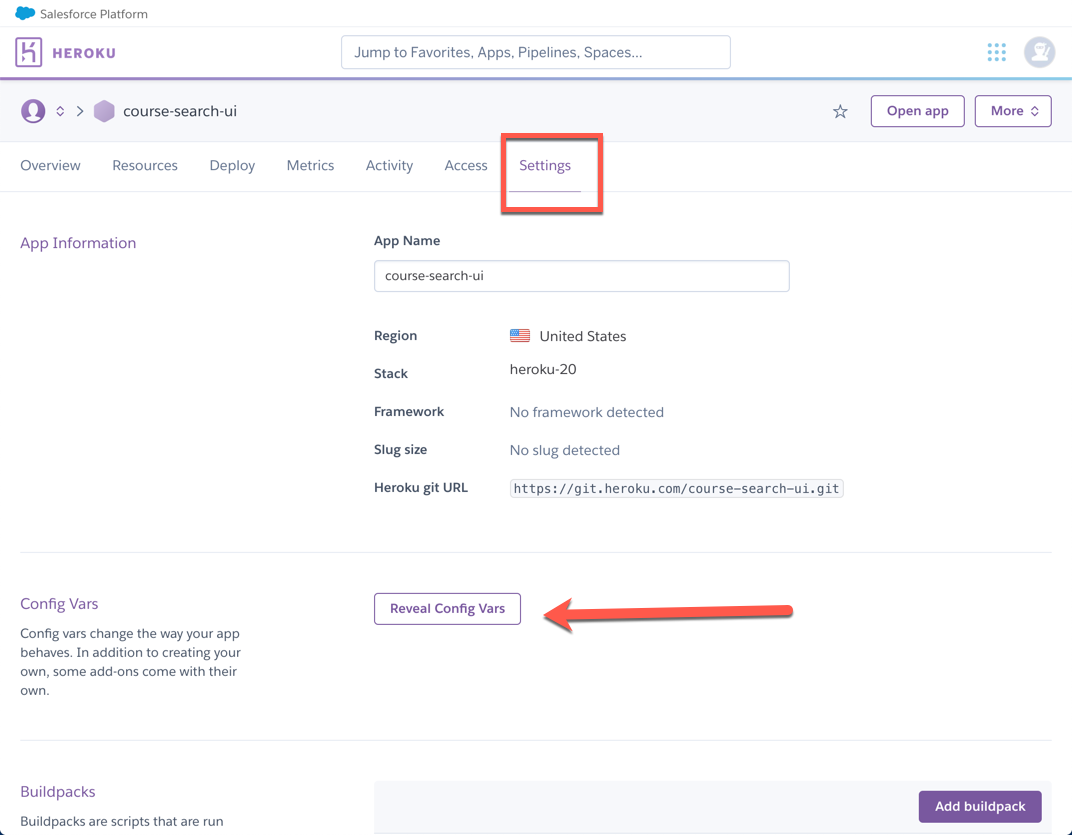
Now head over to heroku.com and create a new app. I've called mine course-search-ui. Once the app is created, open the "Settings" tab and select "Reveal Config Vars".

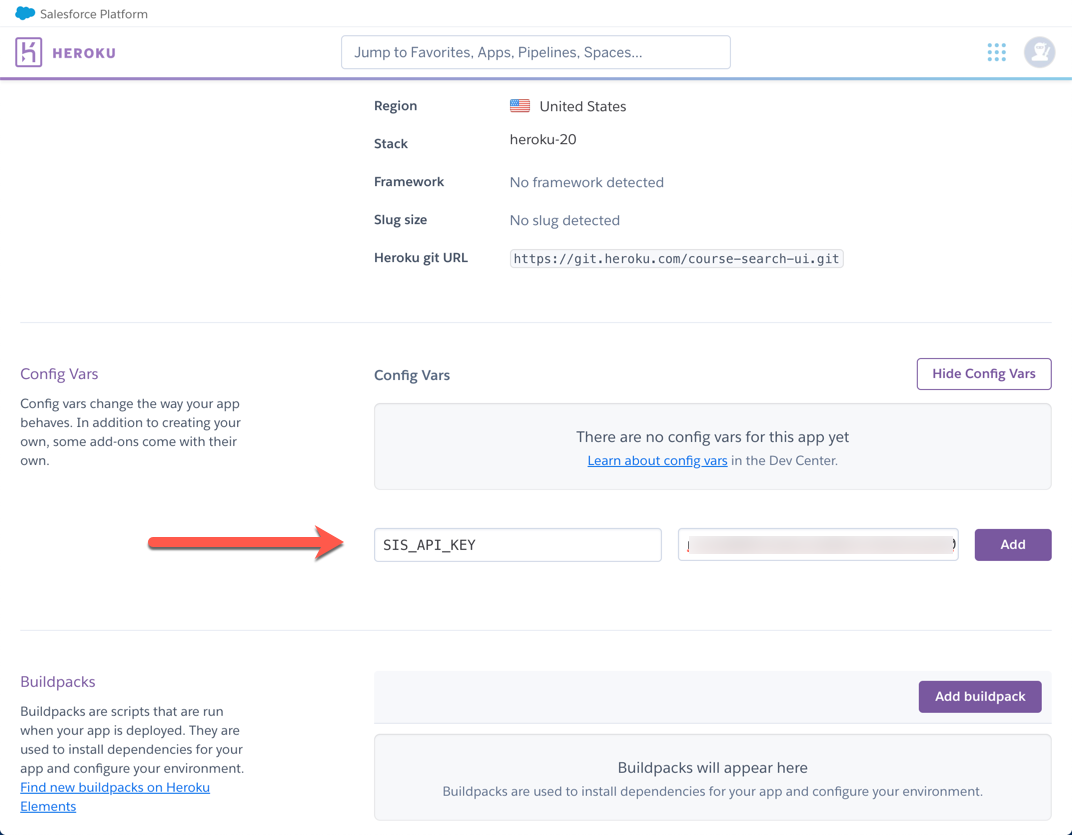
Here you need to provide your SIS API KEY. (Don't forget to click on "Add", and then "hide config vars"!)

Alright, we are all set!!
Go to IntelliJ and open the terminal to let Heroku CLI know what your Heroku app name is:
heroku git:remote -a your-heroku-app-name-goes-here
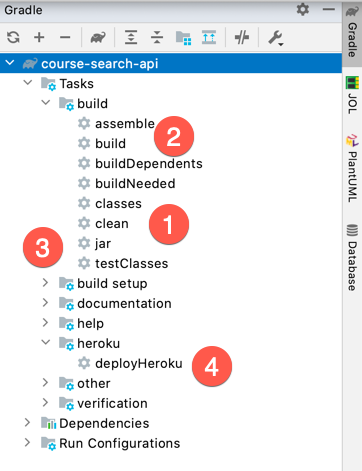
Finally, open the Gradle Tool Window and refresh the project. Next, click on "clean", "build", "jar", and "deployHeroku", in that order. Each time your click on one of these tasks, you must wait for the task to finish before clicking on (running) the next one!

If all goes well, your Web App is deployed on Heroku. My app is deployed here https://course-search-ui.herokuapp.com/. Feel free to give it a try!